Infrared Remote Control of your PC is easy!

Index:

  • Introduction
  • Custom circuit design
    Explanation
    Troubleshooting
    Prototype photo
  • Other hardware solutions
    MC68HC11 microcontroller version
    Universal Infrared Receiver (using PICs)
    Irman
    Tekram AV-100
    IrDA
  • Software
  • Opinions, suggestions, help
  • Introduction:

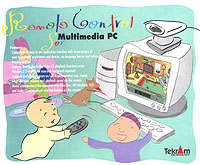
    Today, the remote control for electronic devices has become very ordinary. The widespread use of remote control units for TVs, VCRs, and HiFi has been followed by its use for air conditioners, opening doors, and portable player control, etc.

    So, why not doing the same with the computer? Sometimes, the only interaction between the computer and us is the pressing of the Up/Down or PageUp/Down keys, as in when reading a huge file. It would be better to be able to do a presentation without having to press a key on the computer everytime a new slide is presented. Recently, the MP3 audio files and DVD players have triggered the need to find a more friendly way to control the computer.

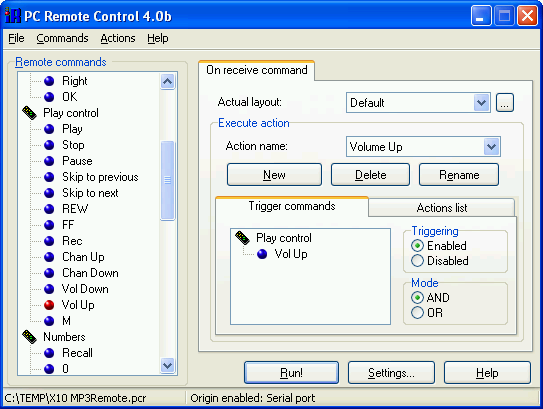
    In this page you can find the hardware and software required to remotely control your PC by means of any standard hand held remote control unit. The software has been designed basically to simulate key pressing in the current active window and control the mouse. It is also possible to launch other applications and to give complete freedom you can also access the Windows API function PostMessage.


    Hardware:

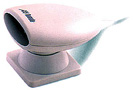
    We need a device that could receive infrared data and convert it to a format that computer understands. The infrared receiver for hand held remotes is sold as a commercial integrated circuit, so the strong work is already made. Some people connect directly the output of these devices to one pin of the parallel port. This solution doesn't require circuit design, but the computer program needs to run quickly and regularly, not always possible in multi-task environments like Windows. Furthermore, computers normally have only one parallel port wich is used generally for printer connection.
    So, it seems better to use that free COM2 serial port that 'nobody' use. Of course, this means a bit more sophisticated circuit, but not too much. Look at the circuit below to get an idea.


    Quick preview. Click on it to see the full resolution scheme
    Click to view the full resolution scheme
    Components list:

    U1 - 74HC14 (datasheet from National Semi.)
    U2 - 74HC132 (National)
    U3 - IS1U60L or GP1U52X (Sharp, Radio Shack)
    U4 - 74HC393 (National)
    U5 - 74HC165 (National)
    U6 - DS14C232 or MAX232 (National, Maxim)
    R1,2 - 1K ohm resistor
    R3 - 22K ohm potentiometer
    C1,2 - 1 nF capacitor
    C3 - 4.7 nF capacitor
    C4-7 - 1 uF capacitor
    - Serial port connector (pins, RS232 info)
    - 5 volts / 20 mA power source (circuits)
     
    Design modifications, contributed by Robert Mauser. It uses only the 74HC14 IC. It seems to work better and specially for large distances. These minor changes affect to the Load, Reset and Clock signal generation. You can also try his circuit suggestion to drain off the power from the serial port (untested).

    Short explanation

    This circuit measures every period of time from a digital signal and sends it to the serial port.
    This is based on a free running counter connected to a shift register. When a low to high transition is produced on the output of the inverter U1a, a narrow low level pulse is generated by means of the U2a NAND gate and C1-R1 net. This pulse leads to the shift register to load the counter data, which is automatically sent to the serial port. Meanwhile, the pulse is inverted by U1b, and the subsequent high to low transition is used by the U2b NAND gate and C2-R2 net to generate a narrow high level pulse which resets the counter. In the next graphic are showed the mentioned signals at an amplified non-real time scale (infrared signal period is much greater than the pulses width).


    The computer receives integer values near the 8 bit maximun amount (255). Look at the example file. These little differences are enough to distinguish between different infrared sequences.
    To believe it, you can see below two graphical representations of received values.

    These are two different sequences:

    These are two equal sequences:


    Giving a certain tolerancy to the values received, the program is capable of recognizing equal sequences.
    Click here if you want to see more graphical representations.


    Troubleshooting

     "I am having trouble getting this to distinguish the difference between any two buttons on a remote"
  • Be sure that the clock generated frequency is 19200 Hz (or near). If you haven't access to an oscilloscope, try to receive similar values that I put as examples (for this, use the SerialWatcher 97KB,zip) by means of changing the potentiometer value. My tester says that the potentiometer has a resistance of 15500 ohms, but this value may vary depending on the components tolerancy.
  • Check that the serial port speed in the program is 19200, not 9600.
  • Switch off the room lights. The IR receiver runs out of control at a certain level of ambient light.


  • Prototype photo

    This is a poor quality instant photo, but lets you see the simplicity of the circuit. The serial cable is from a dead mouse. The IR receiver is at the bottom-right. The chips numbers, from right to left are: 74HC132, 74HC14, 74HC393, 74HC165, the clock pot, DS14C232 and its adjacent capacitors. The big capacitor at the bottom-middle is to filter the input from the power source.


    Other hardware solutions

    MC68HC11 microcontroller version

    The circuit for a microcontrolled version results simpler and easier to build than the circuit made from standard SSI chips, and for a similar cost. I'm using a 68HC11A1P which is easy to find and is ready to insert in the well known white prototype boards. The used circuit is the same as Motorola puts in the section 2.8 of the 'MC68HC11 Reference Manual' for single-chip-mode (HC11 literature) but selecting bootstrap mode. Add a circuit like the MAX232 to connect the PD0/RxD and PD1/TxD pins to your computer serial port and connect the infrared receiver output to the PA2 input pin (input capture 1). This is all hardware required!

    And now? You can upload the program to the memory of the microcontoller, with two options: in RAM or in EEPROM.
  • EEPROM. This is made usually with the PCBUG11 software from Motorola. To run automatically the EEPROM program after reset, you must tie the RxD and TxD pins together.
  • RAM. After reset (in bootstrap mode only) the MCU waits for data from the serial port to store it in the RAM. When proccess is finished, starts the uploaded program execution. Although the available size is very limited, this is a good method to check routines before programming them in the EEPROM (you have 'only' around 100,000 write-erase cycles). I have designed a program to upload S19 files by this method (BLIR for Win95, 99KB zip file, including a HC11 program to test MCU functionality).

  • The HC11 program for remote control (source, compiled with AS11) uses the internal timer of the MCU to measure the time between falling edges of the infrared receiver output (period width). See some examples of data received from the HC11.

    Links to HC11 resources:
  • Motorola 68HC11 home page
  • Embedded microcontrollers
  • 68HC11 microcontrollers resources by Peter Spasov
  • Resources


  • Tekram AV-100

    This device is the ideal solution for people that don't want to spend time with chips and datasheets. I bought it to compare with my circuit solution, and obviously it has some advantages but also disadvantages:
  • No external power source required.
  • Good external appearance for your desktop.
  • Only compatible with itself, that is, only accepts commands sent from the included remote control unit.
  • The included software is not very useful.

  • Although it seems that Tekram has discontinued the production of this device, you still can find it at a price that can vary from $20 to $35 (US). In PC Remote Control, set the serial port speed at 9600 to run with this device.

    Product box Remote control unit included Infrared receptor


    IrDA standard

    Infrared technology using IrDA (Infrared Data Association) protocols is rapidly gaining popularity as a wireless-transfer medium in the computer world. IrDA hardware is simple. It consists of an encoder/decoder for the transmit/receive function and an IR transducer (the transmitter LED and the receiver photodiode). The encoder/decoder connects to a UART, which is already present in most computers.

    Fortunately, many IrDA devices are compatible with the 38-kbps ASK modulation used in TV remotes. This means that they can work with such kind of infrared type signals. As end-user you may find several options to include IrDA as part of your computer features. If you have a portable computer, probably IrDA is already part of it. However, it seems that there are still many portable computers that can't receive TV infrared stuff.
    For desktop computers, there exists two options, depending on the motherboard you have. Usually a Pentium MoBo has a I/O chipset ready for infrared communication. There is a special connector where you can connect the transducer. The other option is buying a serial type transceiver that connects to the standard serial port (RS-232) of the computer. From a IrDA use viewpoint, below are the main differencies between these two options:

    Serial port type
    Maximum data rate limited to 115.2K bps.
    Simple connection to PC serial port.
    Use to work from the first moment.
      Motherboard type
    Maximun data rate up to 4M bps (depends on the model).
    Some extra time needed for connection and checking of the pin assignments.
    May not work well as IrDA (chipset Bios problems).


    PC Remote Control has been tested with success using both type of IrDA devices:

    IrDA and Windows

    PC Remote Control needs to get direct access to the serial port where the IrDA transceiver is connected and thus, the Windows IrDA drivers aren't needed for remote control purposes. If you have already installed the IrDA drivers, they won't let you access the serial port. They create a new virtual serial port, but this one doesn't work with PC Remote Control at all. You would need to deactivate (or deinstall) the IrDA drivers. That is very possible in Windows 95, because the IrDA drivers are not part of the original package and it seems that it is not plug&play in reference to IrDA devices. However, Windows 98 is plug&play and if it detects that your computer has IrDA, then it will install the drivers, locking the access to the serial port for PC Remote Control. Till today, the only solution that seems to work well in order to get rid of this problem is modifying some configuration files so that Windows works with the IrDA devices the old way (as Windows 95 does). Take a look at the comments in this text file. They are changes intended for a IBM Thinkpad, but they can give you an idea of what is needed to do and then make and adaptation to your particular case.
    TV remotes send commands only one way, in a low-speed burst for distances of up to 30 feet. They use directed IR with LEDs that have a moderate cone angle to improve ease-of-use characteristics. Cordless connectivity via IrDA transfers files, point-to-point and bidirectionally, in a high-speed burst for short distances using directed IR with LEDs having a narrow cone angle. IrDA transmissions require relatively careful aiming, and they're easy to block. For this reason, don't expect a great distance while working with the remote unit. The Actisys IR2000L user's manual says that it can communicate at a distance up to 3 meters. The Tekram Irmate says only 1 meter. You can obtain more distance, but using a well IR powered remote unit and always you aim it very well.

    Manufacturers of IrDA adapters

  • Actisys
  • BayBeamer
  • JetEye
  • General info on IrDA

  • IrDA organization home page
  • Links to IrDA resources
  • IrDA resources
  • Windows 95 drivers from Microsoft

  • Software:

    PC Remote Control

    This is a useful program that lets you remotely control your computer from the serial port. You will be able to control the computer with the same infrared remote unit that you use for controlling other appliances, as if you were physically using the keyboard or the mouse.

  • Key press simulation. You can specify Alt, Ctrl or Shift modifiers.
  • Mouse movement and click control.
  • Execution of external applications.
  • PostMessage API function access to send Windows type messages.
  • Volume control.
  • Computer log off, reboot or shutdown.
  • Windows management.
  • On Screen Display of system parameters or free text.
  • Applications of this software:
  • Multimedia presentations.
  • Reading huge files or web-browsing comfortably.
  • Easy way to control the multimedia features of the computer, like when playing MP3 audio files or DVD video discs.
  • After a short learning process, PC Remote Control can recognize the incoming commands from the selected origin and then simulates the action corresponding to that command.

    Program screenshot:


    Download software:

    PC Remote Control is a shareware program. That means that you can use it to evaluate, and if you find it useful and continue to use it you are encouraged to register it. Online registration supported at ShareIt! registration service (?19) and Paypal ($15). See links below.

  • Click here to download
  • (Version 4.0.0.205 BETA; for Windows 95/98/ME/NT4/2000/XP; 738KB ZIP compressed file; no installation required)

    Other useful software:

  • SerialWatcher (for Windows 95/98/ME/NT4/2000/XP; 135KB ZIP compressed file)
    Little program for viewing the data received from the serial port. Cool for debugging serial devices!